If you’re NOT new on the ‘Gram, you must be familiar with at least one of these words (or let me say hashtag): selfie, flatlay, fromwhereistand (or widely known as shoefie aka IG obsession of feet), cityscape, foliage, … the list goes on… vsco, organicbreakfast, artisanalcoffee, blessed…. If you know every single one of the terms I just mentioned, don’t feel guilty, it’s perfectly okay. Embrace it yo.
Those terms mentioned above are composition trends (or hashtags) that have not only become omnipresent in the grammin’ world, which also are widely effective in gathering likes and follows. Take the iconic #flatlay for example (11,000 posts and counting). Flatlay has become a real staple on fashion/beauty/travel/lifestyle influencers’ feed. From showcasing their make up, travel kits to photography gadget (me); from displaying their daily OOTD, to a way of marketing an endorsed brand.

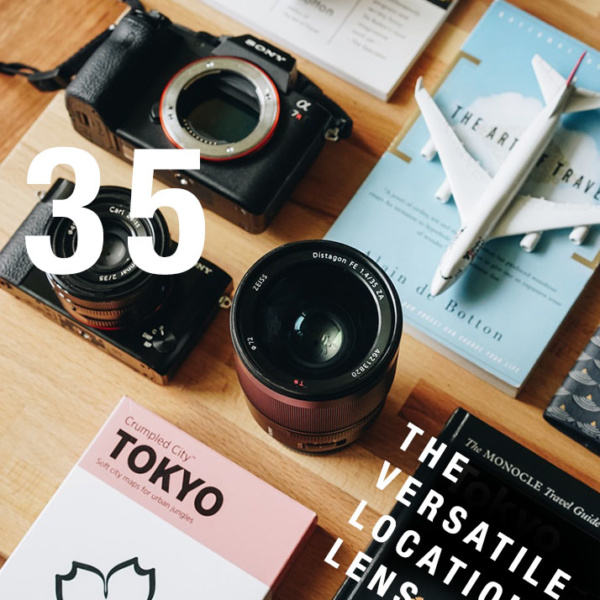
Flatlay of my gadget necessities.The grammin’ game nowadays demands a higher quality, wonderfully styled, aesthetic-oriented images. Sure, some of them (ok most of them… ok ALL OF THEM) are staged, but it’s evident that the shots produced with a bit extra effort will attract more audience. Instead of a personal photo diary, Instagram have evolved to be a creative gallery. Who doesn’t like an aspirational feed? Who doesn’t follow an aspirational feed? #validation
I’m straying too much again. I’ve covered selfie on my previous post so today the post is all about taking your #Flatlay game to the next level. After this one you’ll be pretty much an expert in all grammin’ game. Ready to win the #flatlay? Ready to win the internet? Then let’s start:
Window natural Light is your best friend
By all means, avoid direct sunlight as it will wash the colors, overexposed white colored products and create harsh shadows unless that’s the look you’re aiming for. Instead, opt for window light. The sunlight that get diffused by the window will give you soft shadows and natural highlights on your products. The secret to a perfect, professional looking flatlay? It’s not the right camera, it’s the right lighting.
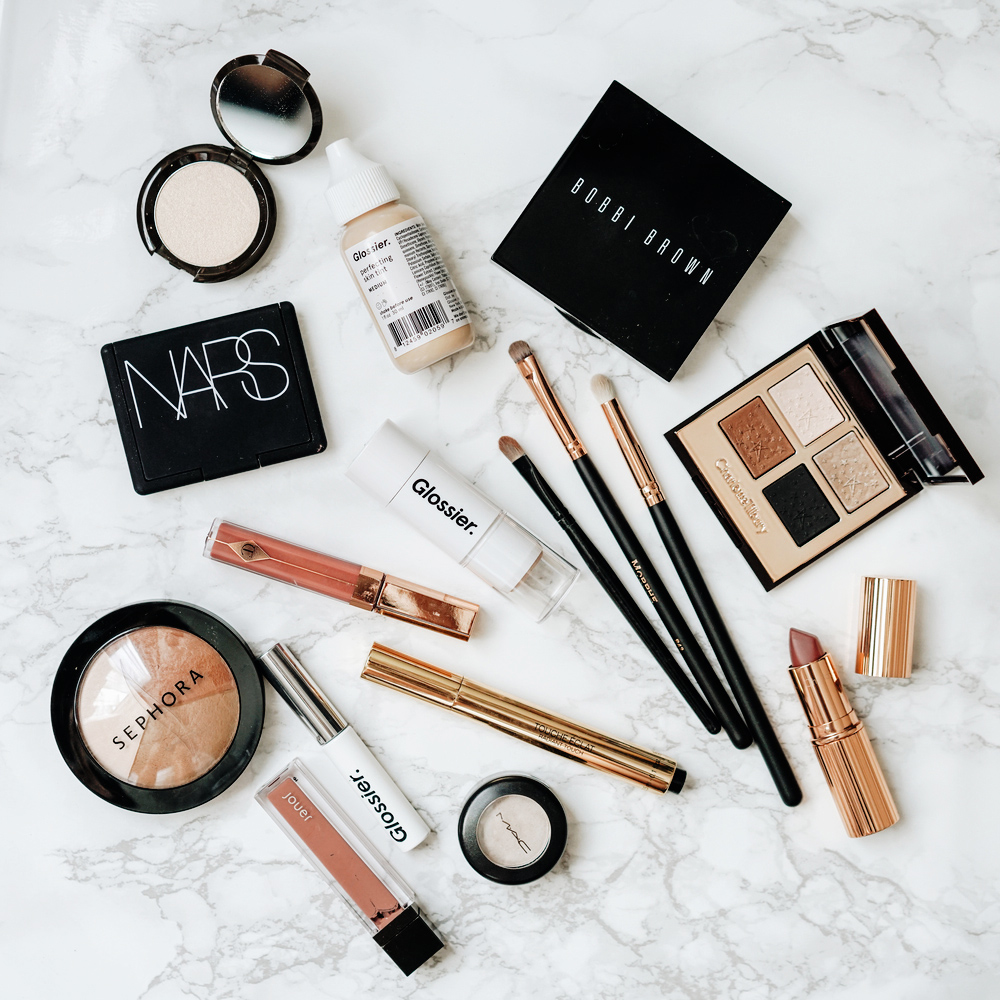
Arrangement: Traditional Style
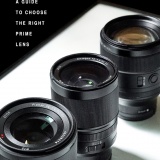
The traditional style is the easiest, most simple way to style a flatlay. So if you’re about to start your first ‘lay, I recommend you to do this one. Basically just arrange your objects in straight, balanced composition. This style looks organised and tidy if that’s the look you’re aiming for. You can also experiment with different angles when photographing it, not just from the classic straight bird-eye angle. Below are some examples of traditional flatlays shot from above and below, with straight angle to slightly tilted.
Arrangement: Effortless, Laid back Style
This style is best compared to this: Do you know the “I woke up like this” selfie that does involve an hour of creating the “no-make up” make up and “out of bed” hairstyle? This is basically the same thing in effort and work. You gotta think which placement works best on arranging your objects while still aim for the effortless “this just fell perfectly on the floor” composition. There will be lots of trial and error. I’d say, start with the object you want to highlight the most, then work your way around it. Keep moving the objects around until you’re happy with the composition.


Use Props and Play with Textures
The most popular background (or should I say layground? It’s more appropriate I think) out there is: plain colored, wood and marble. Find out which one works best for your flatlay. For a clean, minimalist look, choose the plain white/black laygound or black and white marble. For a rustic/organic look, use the wooden texture (I’ve used everything from my wooden floor, cutting board, wooden table and any random wooden planks for this. I once took a piece of wood I found on the street in my hometown and my mom asked me why I brought it home for. She never understood when I said, it’s a purrrrfect layground mom!)
For fashion, beauty and food flatlays, you might want to stay more on the minimalist side. But for travel-themed ‘lays, you can definitely go crazy with the layground. My favorite base for my travel flatlays is a vintage map. I’m a map-oholic, I collect around fifty maps that are scattered displayed around my apartment. Other fun ideas for a summer holiday flatlay is the beach sand, crazy colored plain layground or even the street pavement for a more urban ‘lays. Go crazy babes.
Don’t you love these terms? ‘Lays. Laygrounds. I’m on a grammin’ roll.

Try to find as many supporting props as you can, just remember that they have to complement your main objects. Some corresponding props for travel could be: cameras, sunglasses, passport, notebook, edges of your suitcase, and many more. While for fashion and beauty you can add flowers, magazine, a glass jewelry box, etc. Alska has lots of adorable home decor items that’s functional and stylish. Check out their flatlay below:
Try adding your hands on the frame (or someone else’s, if you’re the one taking the picture.) The possibilities are endless.
Color-coordinated
This is a fun thing to do especially for travel and food flatlays, but it works for other genres too. Collect object in the similar shade of colors and arrange them traditionally/effortlessly for a beautiful aesthetics. (Don’t you just LOVE that phrase BEAUTIFUL AESTHETICS?? That’s SO instagram)

Editing
A quick edit to adjust your exposure and set the color mood is crucial, but don’t go overboard with it. It’s good to keep everything looks natural.
If you want to darken or highlight a certain area, you can use selective dodge & burn which you can find in apps like Snapseed (Android / iOS). Brightening the shadows that falls too dark under your subject can be done with just a simple swipe of your fingers.
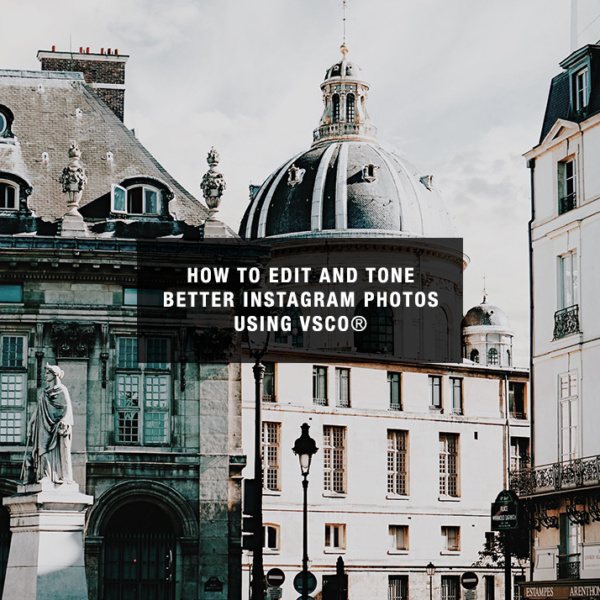
For the rest, your best bet would be (again) the VSCO. This is app does everything from tweaking exposure, cropping, rotating to adding the right filter to make your photos look like it was taken by a professional photography. See the complete walkthrough with VSCO here.
Other Shooting tips
- If you’re photographing something that’s round and keeps rolling around (lipstick, lenses, etc), use a tape/blue tact/tissues under it to keep it steady.
- Get Lots of Options! Keep playing with the object arrangement so you’ll have a lot of photos to choose from.
- Stuck to find the right arrangement? Find inspirations from Pinterest or from other Instagrammers who are Flatlay Experts. Check @flatlays IG account for endless source of #Flatlay inspo.
Ready to take your Flatlays guys? Don’t forget to leave the link to your lays on the comment below so I can send some love! xxx
16